Here’s the dirty little secret: traditional flour is held together by gluten, which acts like stretchy glue. Gluten-free flours—like rice, almond, or oat—don’t have that glue. So when you substitute them, you have to become a texture engineer (fancy, right?).
Your first instinct might be to grab the same amount of “cup-for-cup” mix from the store. That works sometimes, but often leaves your cake tasting like dusty cardboard. The trick is understanding that different flours absorb water differently. Almond flour is a thirsty sponge; coconut flour is a total diva that demands extra eggs.
The Math of the Swap (Don’t Panic)
Let’s get real: you don’t need a calculator, just a bit of common sense. A good rule of thumb is to use 25% less liquid when starting with a gluten-free blend, then add it back slowly. I learned this the hard way when my pancake batter looked like soup—I blame my neighbor’s ghost.
And listen to me closely: always add a binder. Xanthan gum or psyllium husk is your new best friend. A tiny pinch—like half a teaspoon per cup of flour—keeps your cookies from crumbling into a tragedy. Without it, you’re basically making flavored sand.
Another pro tip? Weigh your flour. Please, just do it. A cup of gluten-free flour can weigh anywhere from 120 to 160 grams depending on the brand. Scooping with a measuring cup is a gamble; a kitchen scale is a sure thing.
When to Use What: The Cheat Sheet
For cookies, a blend of oat and tapioca flour gives you that chewy edge without the gluten guilt. For cakes, rice flour plus a little potato starch makes things light and fluffy, not heavy. If you’re making bread—good luck, honestly—you need a high-protein mix like sorghum or teff.
And for pie crust? Use a mix of almond flour and a neutral starch, then chill the dough like your life depends on it. Warm gluten-free dough is a sticky mess that will make you cry into the sink. Trust me on that one.
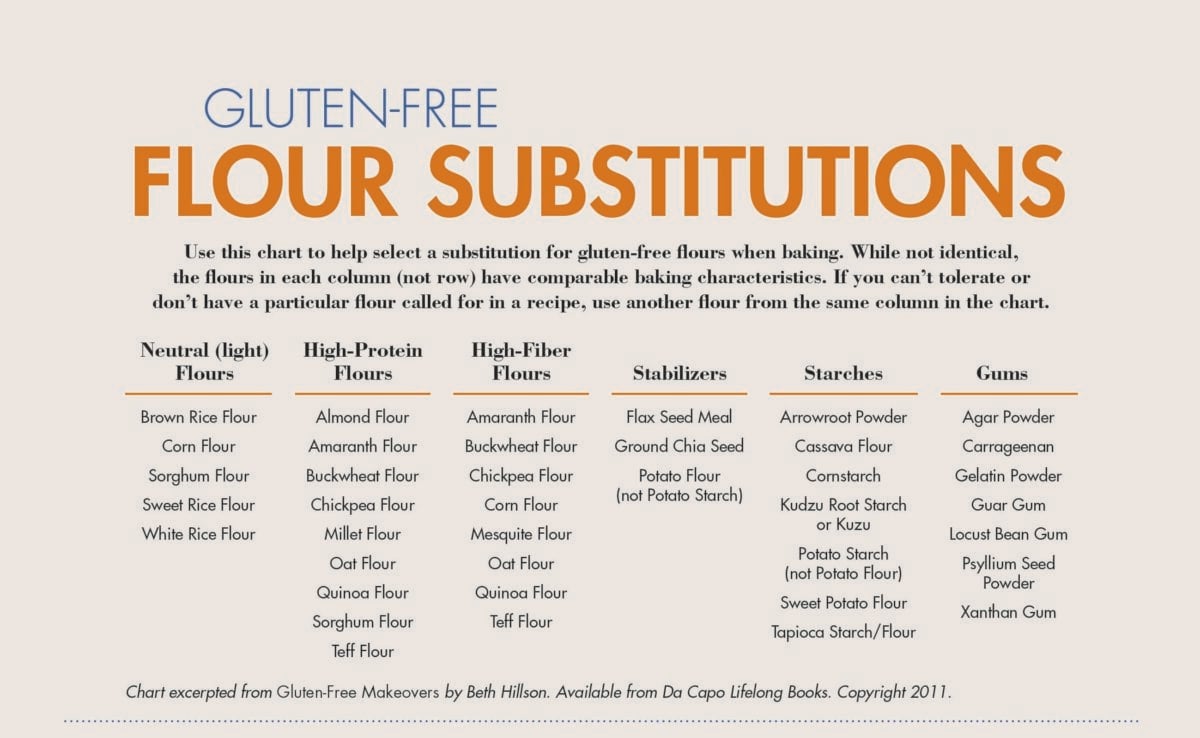 Ultimate Guide to Gluten-Free Baking - Gluten Free & More