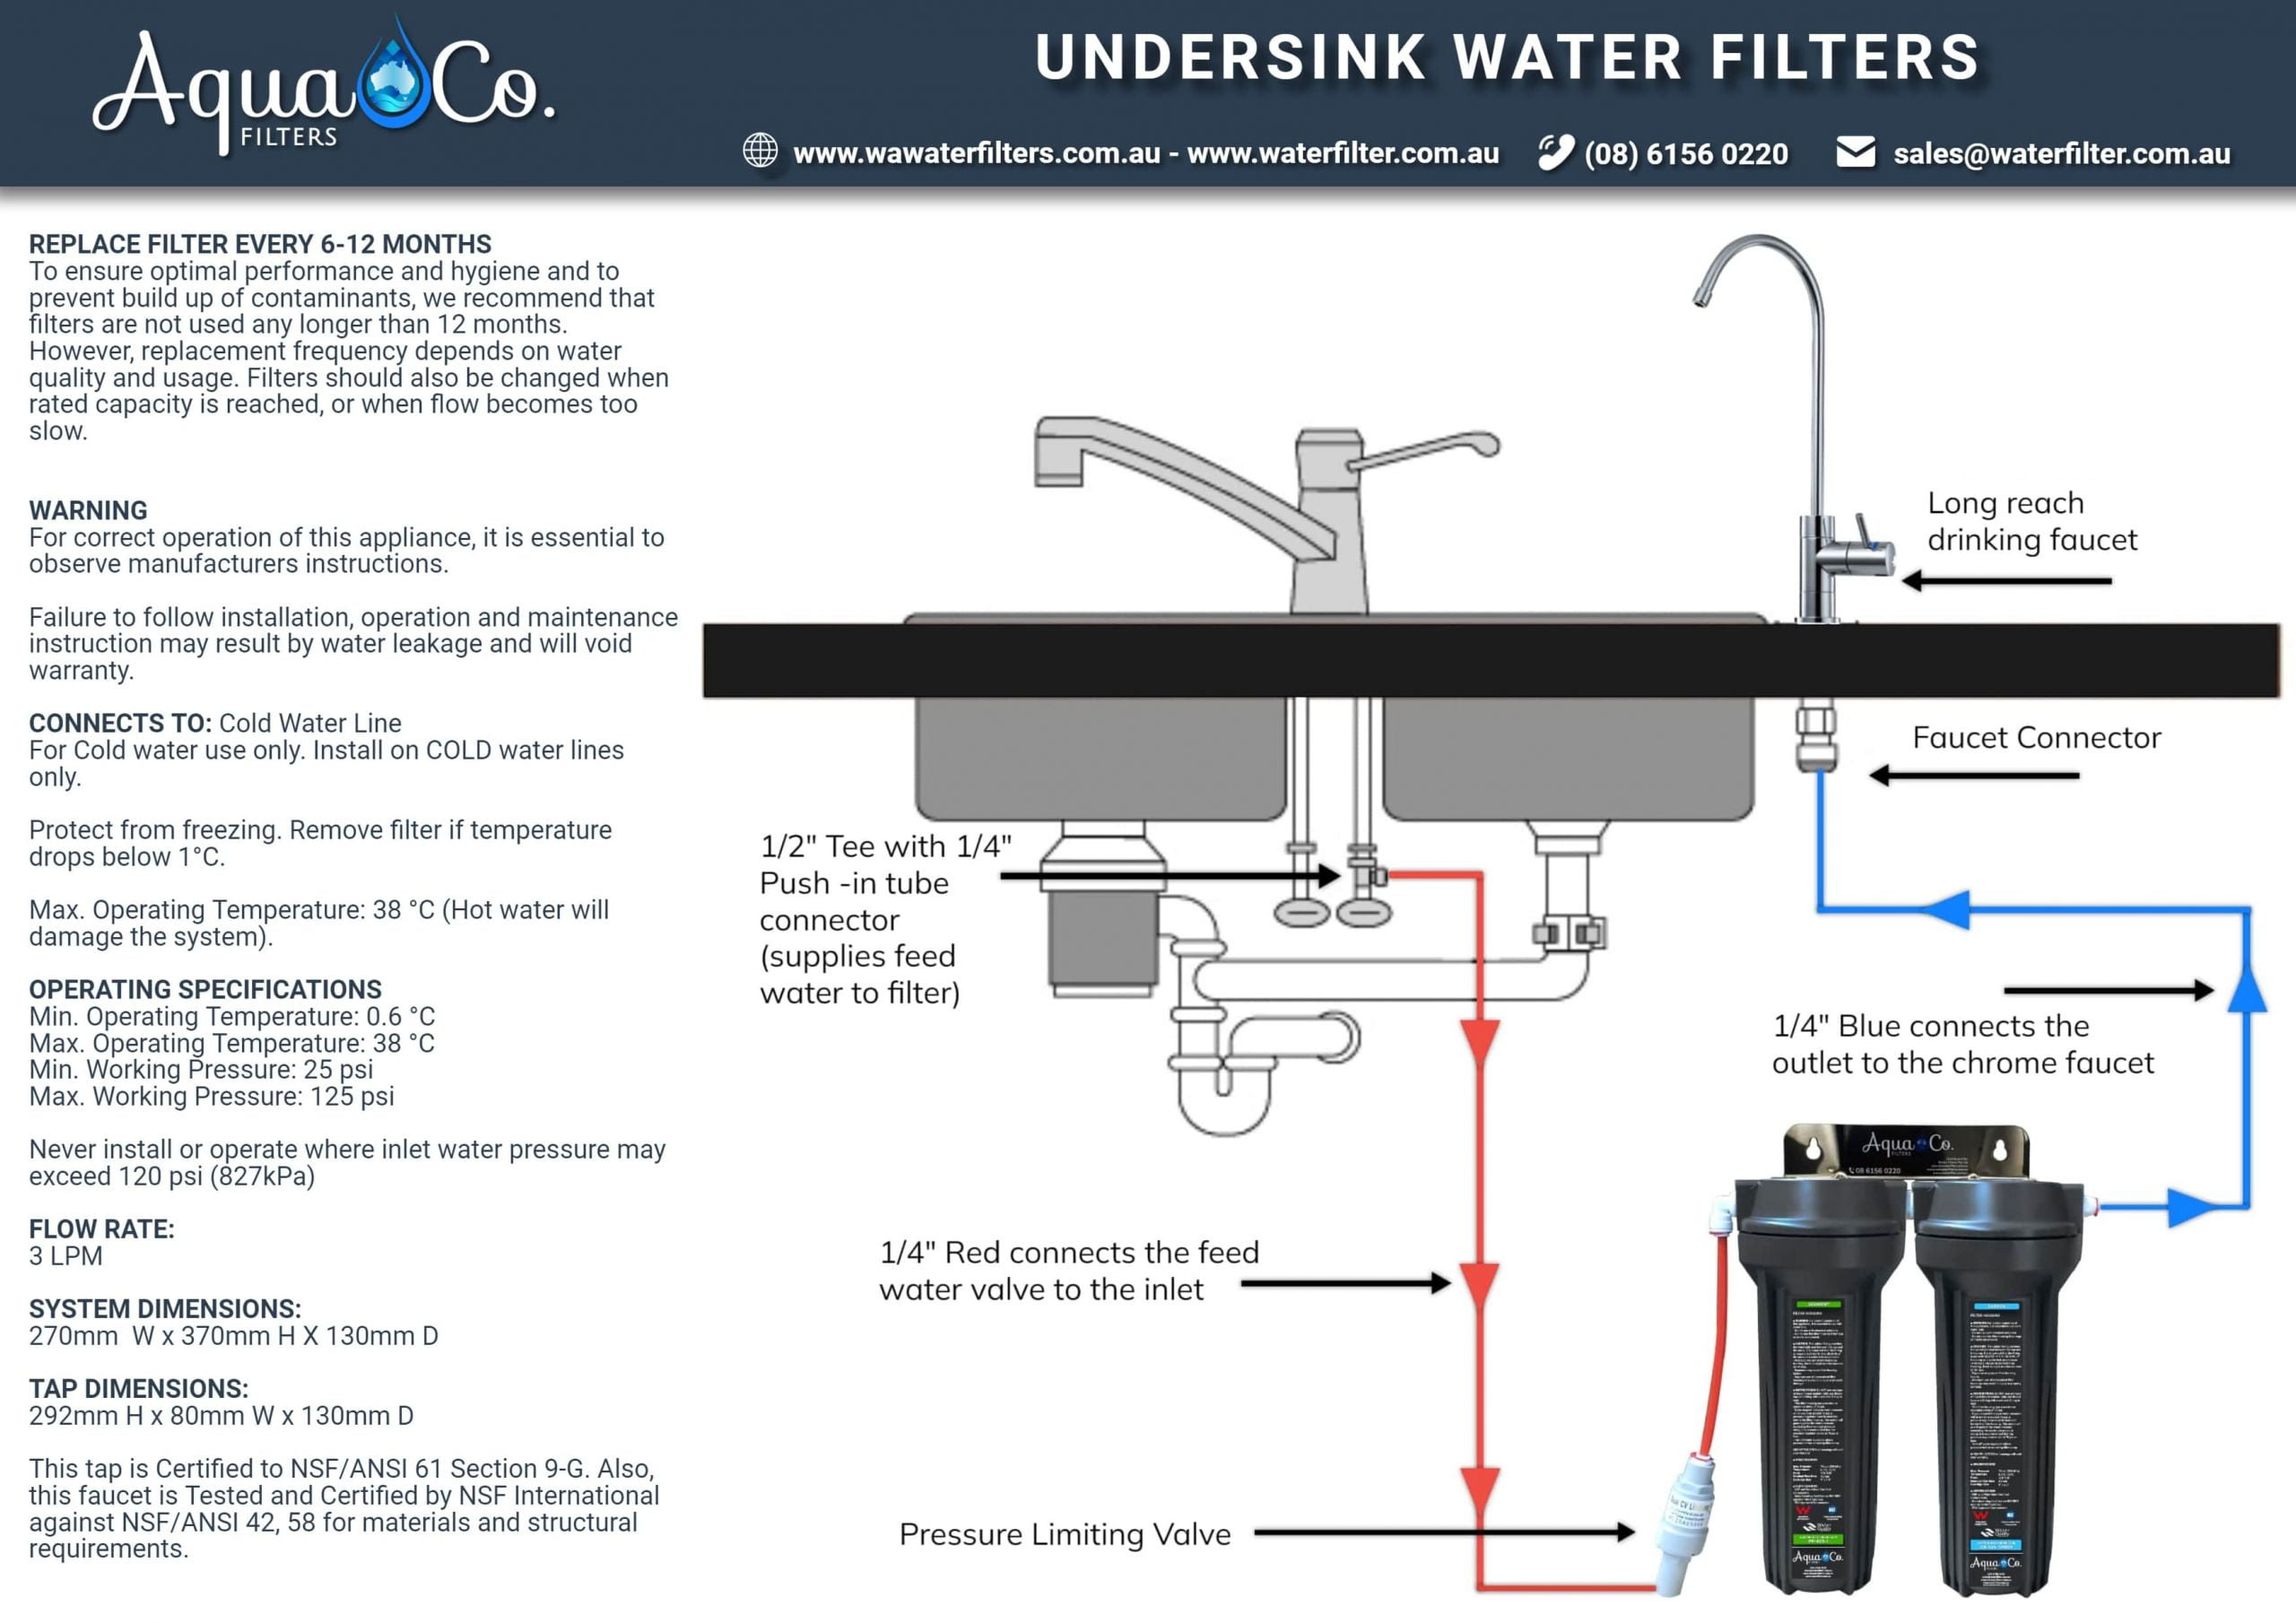
You’ll need a filter kit (obviously), an adjustable wrench, a screwdriver, and maybe a bucket or towel for drips. Don’t skip the bucket. Water is surprisingly good at finding your socks.
Also, check your kit’s instructions. Some kits are like a Lego set—simple and satisfying. Others are like trying to fold a fitted sheet.
Step 1: Turn Off the Water (Seriously)
Look under your sink and find the cold water shut-off valve. Turn it clockwise until it stops. If you accidentally turn off the hot water too, no biggie—you just saved yourself a shower later.
Now, open your cold faucet to let out any leftover pressure. This is a great time to watch the water slow to a trickle and feel a tiny sense of victory.
Step 2: Find Your “Tee” (It’s Not a Golf Term)
Your filter kit includes a little brass or plastic piece called a tee adapter. This thing is the bridge between your old pipe and your new filter life.
Unscrew the connection where your cold water supply line meets the shut-off valve. Carefully—this is where the “Drip, drip, panic” moment can happen. Just breathe and place your bucket underneath.
Step 3: Connect the Tee Adapter
Screw the tee adapter onto the shut-off valve. Then, reattach the old water supply line to the bottom of the tee. The side of the tee is for the new filter line.
If you tighten it like you’re arm-wrestling a gorilla, you might crack something. Just “snug” is perfect—hand tight plus a quarter turn. Your future self will thank you.
Step 4: Mount the Filter Head
Most filters come with a bracket to screw under the sink cabinet. Find a spot where the filter cartridge can sit upright, like a proud little soldier. Don’t put it right where you store your cleaning chemicals—unless you want bleach-flavored water.
 How to Install an Under Sink Water Filter: Guide for Water Filtration
Use the screwdriver to secure the bracket. The wood in your cabinet is not sentient, so it won’t mind a few small holes. Probably.
Step 5: Connect the Hoses (The “Spaghetti Dance”)
Now run the small tubing from the tee adapter to the filter head’s “IN” port. Then run another tube from the “OUT” port to your new faucet or the dedicated spout included in the kit.
Cut the tubing with a sharp knife—straight cuts only. A crooked cut is the enemy of a leak-free seal. Imagine you’re the world’s most careful sushi chef, but for plastic pipes.
Step 6: Flush the System (The Gross Part)
Turn the water back on slowly. Check all connections for drips. If you see a drip, tighten the nut just a little—gently now, like you’re patting a baby’s head.
Then, let the water run through the new filter for five to ten minutes. The water may look cloudy or black at first. That’s just carbon dust—very fancy carbon dust, but still dust. Don’t drink it.

